11 deep pressure exercises that calm and build strength
Children on the Autistic Spectrum often struggle with anxiety and frustration. Triggers can include sensory processing issues, communication difficulties, transitions or routine changes. Sometimes these problems can completely overwhelm our child, leading to a meltdown or shutdown. Suppose we can tune into our child’s heightened state of arousal (i.e. increased stress levels) and respond accordingly. In that case, we may be able to calm their nervous system and prevent the fight, flight or freeze response they experience when in extreme distress. One way we can do this is to apply deep pressure. Deep pressure provides our child with proprioceptive input, which can help regulate their nervous and sensory systems. Using our own body as a tool is the most effective way of applying deep pressure. It’s also practical as we don’t need any equipment to hand. The simplest technique – and the best in the heat of the moment – is to push down on our child’s shoulders firmly. They may also benefit from having their arms and torso squeezed. If our child is feeling more receptive (so not at the absolute brink of a meltdown), we can also encourage them to try one of the eleven ideas below. These exercises are good because our child can learn to do them with minimal carer input. This is useful if they don’t like being touched by others, and it also arms them with new tools for self-regulation. The exercises also have the benefit of improving body awareness and building strength in the arms and hands. This will help our child develop the manipulation and dexterity skills they need to undertake daily living activities, like writing, dressing and using tools like cutlery and scissors. |
If our child has an under-responsive tactile system, they may benefit from some preparation steps to help wake their system and build their awareness of their arms and hands.
Give the arm some firm squeezes from their shoulders down to the tips of their fingers.
Use a sensory brush along their skin using fast, firm strokes.
Rub the arms and each finger with a flannel that is wet, dry, warm or cold will add an extra layer to the sensory experience.
Play clapping games.
A vibrating massager also helps to alert, and our child can potentially be in charge of controlling it.
Fun arm, hand, shoulder and elbow strengthening exercises
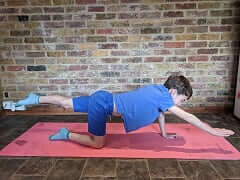 This exercise works well coupled with a focus on breathing control. Perhaps suggest holding each posture for five slow breaths. Some children respond to being competitive, by holding a pose for a specific period of time.
- On hands and knees: reach one arm straight out in front in the air, like Superman! You can challenge the child to balance a beanbag or soft toy on the back of their hand to keep it up. Try and hold for one minute.
2. Put arm down and lift one leg up straight out behind. Try and hold this for one minute.
3. See if your child can hold an opposite arm and leg out at the same time and hold it for one minute? This will challenge their shoulder, elbow and hand stability muscles.
4. Try the other side.
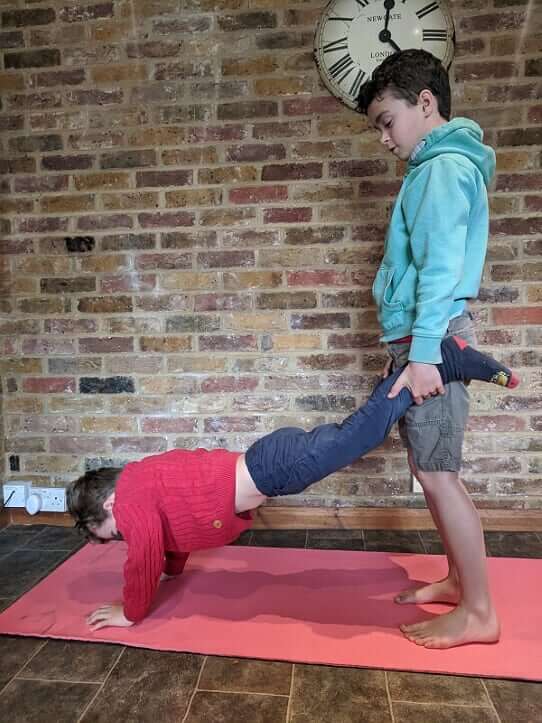
Hold your child by their hips with their legs straddling you and their hands on the floor. Move around the floor picking up objects for as far as you can go.
Move your hands down to your child’s knees and walk around the room – picking up objects or playing a matching game or skittles.
If you can, hold your child by their ankles. Make sure they keep their bottom in the air and don’t hang their tummy down. Again, a game can make this more entertaining.
As your child gets stronger you could try to get from one end of the house to the other – even trying going up any steps or the stairs.
You could also make an obstacle course to go around or over.
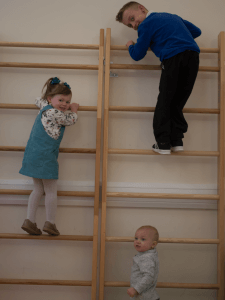 Any climbing using hands will be good for hand and shoulder strength and stability. This includes climbing on furniture or up the stairs. The more weight which goes through the arms, the better.
2. The most challenging activity is hanging on a bar or going along monkey bars. Commercially available “chin up” or gymnastic bars might be an option for you to try. Otherwise, if it’s safe try getting your child to hang off a door or cabin bed frame – supervision is obviously required here.
 Both headstands and handstands are brilliant ways to challenge your child’s whole arm, hand and fingers strength. They should be tried only if your child has a good level of fitness and strength already and can manage the wheelbarrow exercise held at their ankles.
 The videos linked below take you step by step through the process of learning to do a headstand and handstand. Make sure your child takes these very slowly to avoid injury. Help and supervise your child throughout.
This video takes you through the process of doing a headstand. Watch the whole thing through before you try. Make sure your child is stable at each step to avoid injury later on.
This video is great for teaching a smaller child the beginning steps of a handstand. The final step is up against a wall.
This video is appropriate for teaching handstand to older and stronger children who love a physical challenge. If your child is very physical this will be a good challenge and may also help to calm and regulate them. Remember to stay with your child throughout these exercises for safety.
See this ‘Our Home’ video on hand strengthening with playdough – kneading, pulling apart, squishing, pinching or wringing the playdough can all be great hand strengthening exercises.
To make it harder, use a firmer dough such as putty or clay. The dough can be flattened in different positions to gain extra pressure (e.g. on hands and knees pressing into the floor, in high kneeling pressing into the wall, in standing pressing into the table).
For finger strengthening, try hiding objects such as tokens or marbles in the dough and your child has to stretch it to find them.
We have different adaptions on our YouTube channel including salt dough in a plastic bag for those who are hypersensitive to touch and sensory dough recipes.
Dough or putty and portable, which makes it a great item to store in a container, which you can take with you on an outing.
Stand in front of a wall with your feet about one foot away. Place flat hands on the wall (fingers pointing up) so that there is a slight bend in the elbows.
Slowly bend the elbows until your nose nearly touches the wall and then push back to straight arms. Make sure that the heels stay down on the floor as this will provide an even greater stretch to the muscles. Try 10 repetitions.
Sit on a chair with armrests. Make sure feet are flat on the floor.
Lean forwards slightly and using only your arms, push through the armrests so that the elbows straighten and your bottom has cleared the seat. Perform 10 repetitions.
Use a large piece of newspaper or junk mail and ask your child to scrunch it into the smallest ball they can with two hands.
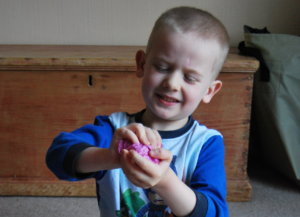
Now ask them to do it with one hand. This surprisingly challenging – they cannot use their tummies to cheat!
You can create a target to throw at – maybe the recycling bin?!
This is also a great fun warm-up for drawing and writing activities as it activates the muscles needed for pencil control.
Use a large piece of newspaper and ask your child to scrunch it into the smallest ball they can with two hands.
Now ask them to do it with one hand. The manipulation needed for this will strengthen all the small intricate muscles of the hands.
Spray bottles are a lovely way to strengthen the fingers. Fill an empty bottle with water and use it to spray the grass, flowers, windows, etc. It can even be used in the bath. Switch hands and keep spraying until the hand feels very tired.
Put soft salt/playdough in a plastic bag and make a small hole – squeezing it out can make a lovely snake of dough.
Squeeze stress balls -Encourage your child to squeeze this or just poke into it with their fingers. See our ‘Our Home’ video for an easy way to make a stress ball.
Squeeze the water out of sponges (vary the size) using one or two hands. You can try and fill a jug.
Position hands together in a “prayer” such that palms fully touch and elbows point out to the side.
Press the hands together for 5-10 seconds. To ensure that enough force is going through their hands, you can place a piece of playdough or putty in between for them to flatten OR secure a sheet of paper that you try to pull out from between them.
Get into a reverse table position making sure that hands are flat on the floor.
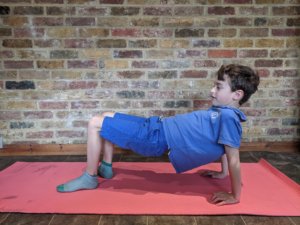
Lift the bottom up fully and “walk” around the room. Your child can kick a ball or a balloon to make it more interesting. Take breaks as needed as this position can put a strain on the wrists.


