


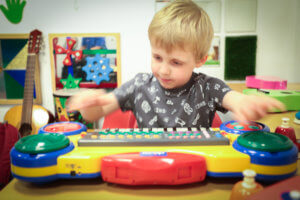
Playing with musical toys is a great way to build hand-eye coordination. Beating a drum, hitting a bell or pushing notes on a keyboard all help develop the skill.
If you don’t have any instruments at home you can use everyday objects like a wooden spoon and upside down saucepan as a drum, or a plastic bottle with some rice in it as a rattle. Silver foil is great to scrunch.
This blog shares some other ideas for making instruments using everyday objects in the home.
To build accuracy using musical instruments, invite your child to play a ‘Simon Says’ music game. Play a simple beat/tune on an instrument and challenge your child to copy it. Then they can create a beat/tune for you to copy.
There are some fabulous apps for tablets which require very little movement to get a big effect. We share some of our favourites below.
If your child finds it difficult to isolate their pointing finger, see our video on how to isolate a finger for using a tablet/iPad.
Sensory Light box or Sensory Soundbox (£2.99 each from Apple or Android). Just a touch on the screen produces a wide variety of sounds and noises. As you move your fingers/hand the noises change. Very calming or stimulating, depending on the setting and wonderful feedback for cause and effect.
 Fluidity HD (free – for Apple devices only). Beautiful flowing colours controlled by any touch on the screen.
Baby’s Musical Hands (free – for Apple and Android). Musical and colourful app – any touch will play a piano sound.
Finger paint (free for Apple and Android). Opportunity to paint with different colours and sounds. User can use multiple fingers at a time to paint, which is great for those who struggle to isolate a single finger.
For more advanced cause and effect apps try:
 Duck Duck Moose nursery rhymes series (free on Apple and Android). These are a series of apps with entertaining and often surprising cause and effect options which can keep your child (and you) entertained for ages. They are pretty frustration free as this can be played with children who will use a fist or who have less dexterity in their hands. We particularly like Itzy Bitsy HD, Old Mac HD and Trucks HD.
Dr Panda series (vary from free to £3.99 on Apple and Android). Has some lovely options with simple yet entertaining games which require a little accuracy with a pointing finger but nothing too complicated. We enjoy Dr Panda Restaurant, Hospital, Beauty Salon and Daycare.
Start by blowing bubbles and catching them with the bubble wand. Bring the wand closer to your child and see if they can pop the bubble. If your child can’t use a pointer finger they can just use their whole hand.

Move the wand around so that they are reaching to pop in different directions. You could even let the bubbles fall on their tray so they can pop them on the tray.
When they are moving their arms to meet the wand, start blowing the bubbles into the air close to the child so that small movements of their arms will pop the bubbles.
Move on to blowing fewer bubbles so your child is encouraged to be more accurate with their popping.
-
Roll a ball between you and your child. Start with a big ball and get smaller as your child improves.
-
Encourage your child to try and stop the ball when it comes to them before rolling back.
-
Try rolling with more accuracy – e.g. into a upturned container.
-
Try stopping the ball with two hands
-
Try stopping the ball with one hand.
-
Set up a table wobble board for the hands using a tray and a bottle or rolling pin.
-
Try the great hand-eye coordination game in this video.
-
Staying nice and close to each other, roll a balloon to your child and ask them to hit it back. This is great for cause and effect as little effort goes a long way. The balloon moves slowly so your child has more time to aim the hit back.
-
As your child improves, stand or sit further apart and launch the balloon into the air rather than along the floor.
Use a beanbag or soft toy to practice throwing. Start with a big container or target very close to your child.
As your child gets more accurate, move the container further away.
You could encourage your child throw different items into different containers. This could be sorted by colour (e.g. green toys into the bucket, red toys into the laundry basket), or another category (e.g. dinosaurs through the hoop, farm animals into the saucepan).
-
Set up a Ten-pin bowling set with empty plastic bottles or stack a pyramid of empty tins.
-
Start very close to the target.
-
Give your child a large soft ball or soft toy to throw.
-
Encourage them to get more accurate by seeing how many throws it takes to knock them all over.
-
You could set up a ramp (a piece of cardboard, tray or cushion) off their tray or lap to help them
-
As your child gets more accurate, move the target further away.
-
You can also use a points system in a target game. Draw a target on some cardboard, put a points value on the different section and fix it to the door or on the floor. Encourage your child to throw a ball/toy at it and see how many points they can score in five throws. Then see if they can beat their score.
-
To make the game more challenging, use post-it notes as targets. Put a number of points on each post-it and stick them to the wall – the higher and smaller the post-it target, the higher the points value. This offers a good maths challenge for the child too.
-
You could also put letters on the targets and ask your child to spell out a word.
Boccia is a fantastic team game that you can play anywhere! The aim of the game is to throw your team’s ball nearest to a target ball. It can be played with as few as two people and from a wheelchair. If balls aren’t available, use rolled up socks.
See our video for a run-through of this very inclusive game.
Give your child a bucket. This could rest on the floor or tray in sitting or in their arms.
Throw a beanbag or other soft toy into the air and they need to move the bucket to catch it.
As they get better, make the bucket or container smaller so they have to increase their accuracy.
You could also use a smaller or harder for ball for an extra challenge.
Start with a big soft ball and stand or sit very close to your child. Roll the ball into the child’s hands so they get used to holding it and balancing the ball between two hands.
Next, ask the child to throw the back to you. Keep practising until they are accurate to you at a very small distance.
Start moving back a little so there is a gap between you.
Try making the ball a bit smaller – soft balls and beanbags are easier to catch than fully inflated balls. If you don’t have balls at home use rolled up socks, small cushions or soft toys.
Move onto large inflated balls such as footballs and then smaller inflated balls or any other smaller ball.
Progress from two handed catches onto one handed catches
See if they can catch on their own – throwing into the air or against a wall.
Try moving further apart from each other one step at a time to increase the challenge. If you are feeling brave try this outside with water balloons!
Trapping the ball/toy/beanbag, in the elbow, under the chin, between the shoulder and cheek, under the arm or behind the knee and then letting go can be fun. Try to move the object between creases (elbow to elbow, cheek to elbow). See our video which demonstrates how to carry out this first step to juggling.
Create a ‘Juggle-board‘
You can use a flat clothes airer to create a board which enables you and your child to share a adapted ‘juggling’ experience together.
To play, rest a ball at one side of the airer, and use your hands to roll it between you and your child. The struts of the airier will act as ‘tracks’ that keep the ball rolling in a straight line.
To build the challenge, add another ball, and roll it so that one starts before or after the other. Try rolling the balls at the same time at different speeds.
Try sending ball across the board with opposite hands. You could ring a bell or make a sound effect when the ball has reached its destination.
Introduce a slow piece of music and try to pass the ball on the beat of 1, 4 or 8. See our video for details of how to set this up.
The progression to this is juggling with just one hand, and then eventually juggling with three balls for the ultimate in hand-eye coordination.
You can also watch our ‘Our Home’ video on how to make your own juggling balls here:
Start by encouraging your child to ‘post’ soft toys or larger balls into an open container.
Progress to posting smaller toys into a smaller container. You could combine this with a matching game: putting the red objects into the red container, blue into blue and so on.
Shape sorter games are fantastic for eye-hand coordination. If you don’t have one, cut a hole in the lid of a plastic pot and post small objects through the hole.
As your child gets more accurate, cut smaller holes or slits and post smaller objects such as coins, pebbles or buttons.
You could cut different sizes of holes so your child has to work out the best one to post their object through.
Finger paints are a great ’cause and effect’ way to start to develop hand-eye coordination. Start by painting vertical and horizontal lines, before trying diagonals and lastly circles (which are more complex).
Messy play can offer good opportunity to make trails with fingers, and follow lines. See messy play for ideas.
When the child is more confident move onto using brushes, crayons or pencils.
See our ‘fine motor skills’ section for more details of how to encourage drawing and painting.
Puzzles are a lovely way to develop hand-eye coordination. However as some children will try to use force to make a puzzle piece fit, be sure to start with puzzles well within their abilities so you can teach them about turning puzzle pieces (or turning the board if they can’t turn their hand as well).
Puzzles with pegs on them are often the best place to start if children don’t have full hand control.
Move onto regular flat puzzles as skills improve.
Use smaller or increased numbers of pieces as skills improve.
If you don’t have puzzles at home, find a good picture from a magazine. Cut it into large or smaller pieces which your child can then piece back together.
